
The patterned papers in this kit are to. die. for. Among others, it includes new Prima (HELLO! The Prima shipments are in @ Paper Niche - I stopped by last weekend, and was literally blown away by all the Prima stuff!!!! Prima in all shapes, sizes, assortments... flowers, fabric, trinkets, fabric albums, mistables, letter stickers, iron ons, ribbon - oh the ribbon, and DON’T EVEN GET ME STARTED ON THE PATTERNED PAPER!!!!).
Today I’m only sharing the Layouts I created with the kit (SO FAR). Please check me back tomorrow, because I’ll be sharing the mini-book I made from the kit with Crate Paper’s amazing Restoration Collection (AND a couple handmade Canvas flowers)!! Yes, the kit includes several Crate Papers and a whole sheet of their Chipboard Accents!!!! EEEEEEKKKKK!!! Don’t forget, come back tomorrow ;)!
Ok, back to today’s post... {Everything you see in all of these projects all came in the kit - and I have a TON of product left over just awaiting other projects!}... P.S. click on the pics to see the details - I'm sorry I never seem to edit them properly!
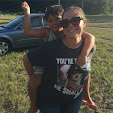
This was the 1st LO I created with the kit. I adore these pics. of my 2 favorite boys! First Yankees game for Christian. We live in Florida, and support the Marlins, but the New Yorkers in us are still alive and well ;) It was a big deal for them as father & son.
The patterned paper is Bo Bunny. I painted chipboard letters (Kaiser Kraft) and edges of the paper with Tim Holts Crackle Paint in Barn Door. The (Prima) Canvas Cutouts in this kit were amazing! Here, I used the flourishes and, after cutting them out, distressed all along the edges with the Tim Holtz Distressing tool (which worked pretty nicely) and added some (Platinum) Stickles to them. My hubby says it’s a “girly” page. I told him to stick it, because I think it’s cool. I think it’s boyish enough, but, ya’ know, I AM A GIRL. What do you think??:

This is my fave. layout from the kit. Alivia (and our family of 4 for that matter) was only 10 days old. It’s funny too because they pulled her binki out right before shooting the one pic & look at those lil baby lips ;). SO sweet! I based the LO on a song by Kenny Chesney “There Goes My Life”. Ok, funny story. I have despised Country music forever. As long as I can remember. For really, forever. Then, when I was 3 months pregnant with Christian I was flipping by MTV & went by CMT & this song caught my ear. I was literally crying my eyeballs out. I made the switch right then and there. Now, 6 years later, I’m Country music all the way. Only. Ok, enough about me. So, because of the “theme” of the LO, I decided it would be fun to use the (Kaiser Kraft) music notes stamp in the kit to stamp on the cream colored Prima letters (the paper for LO & flowers is also Prima). I think it’s a really cool effect. I used archival ink. I tried it out on a few misc. letter stickers 1st (like the Q’s, J’s etc.) and it worked. I had to use Archival ink though ;) I’m obviously still on my handmade flowers kick:

For this last LO, I started with Cream Bazzil and misted it with (Forest) Glimmer Mist. Then I cut 3x3 squares out of the Prima paper (to matte a few pictures onto) and punched a few scallops to create a banner with the twine from the kit. I inked all of the edges of all of the paper with Tim Holtz’s Distressing in “Pumice Stone”. I did the same thing with the (plain white) flowers. Just ran the distressing over the edges of them with the Ink Blending tool, and then I misted them and the (Kaiser) chipboard letters in the same Forest mist. I’m not great with flowers. I need a class on layering or something. I can learn A LOT from the other girls on my DT - THEY ARE AMAZING!!!! Natural Layerers:

That’s all for me today. Don’t forget, come. back. tomorrow. {please} Check out my mini-book. It’s from a trip Sal & I took to NYC back in 2000. The “before kids” days... heck it was before our married days! The do whatever you want days (without stopping in a bathroom every 5 minutes) hee-hee. It’ll be a picture over loader. As opposed to a WORD overloader like today. I’ve confessed before, I’m hyperverbal. It’s a problem and I’m working on it :D. Have an amazing day!!!


Hi heather, I was at the PN today and saw your work. I especially loved your yankee boy LO and also your mini book turned out awesome!!
ReplyDeleteWhat a sweet set of pages, great colors and design.
ReplyDeleteHeather, they are gorgeous!!!! that banner is adorable. Can't wait to meet you!!!!!
ReplyDeleteFantastic pages, Heather!! :o) I especially like the Smile one -- what a sweet page!
ReplyDelete